Well, it's beginning to look and feel a lot like Christmas with the snow and the cold and the frenzy of activity. I love the snow and the holiday season in general. At least the cold makes me want to stay inside and get my decorations up and cook.
I always have the best intentions at the beginning of the month with getting everything done early and being organized with extra little gifts and baked goods for family and friends. Then reality sets in- it's getting toward the middle of the month, and I don't have a lot of those "things to do" crossed off my list and Ralph's "honey do" list gets a little longer.
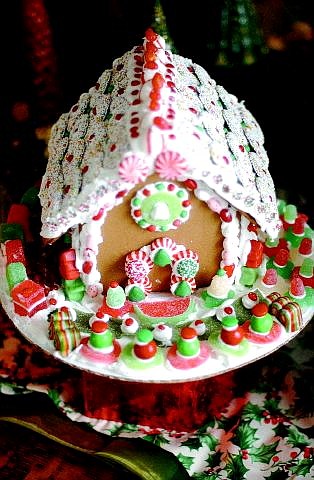
If you have extra time and want to do a fun project with the kids or grandchildren, try making a gingerbread house or two. Once you display your house, every time you look at it you feel good over and over again. I've been making and decorating the houses for more than 15 years, and this is what I've learned.
Set aside enough time so you won't be in a hurry. The decorating goes pretty fast, but putting houses together takes time for the frosting to dry. Putting the roof on before the walls are set can be disastrous and will cost you more time holding the roof in place so it doesn't slip off.
Frosting is the glue that holds it all together and hides a multitude of mistakes. You always need more than the package that comes with your kit or one batch of homemade.
For beginners, start with a kit, buy extra candy, some marshmallows, pretzels, Tootsie Rolls and anything else you think would look good on your house. Make an extra batch of frosting and make sure you have a sturdy base to put your house on. For easier clean up, spread parchment or butcher paper all over your work surface. It's much easier for kids to work with the frosting in a Ziploc bag with a little hole cut in the corner, with no frosting slipping out the back end of the squeeze bags.
Some of the kits say to put your house together then decorate it. I don't agree with that because kids tend to put a lot of candy on, and it tends to slide off unless the frosting is dry and the candy is set. We've built some houses where there was such heavy candy on the roof you almost needed a crane to get it on the house.
Also if you want to make a house for yourself, help the kids first then do yours a little later; it can get chaotic. Decorate your house with it laying down, then let it dry. Put one front and side together; let set. Add the other side and back, Let dry at least half an hour then put your roof on. Most importantly let the house dry completely (a couple of hours at least) or overnight before you try to move or transport it.
ORNAMENTAL ICING
1 box (16 ounce) powdered sugar
1Ú2 teaspoon cream of tartar
3 egg whites at room temperature
Combine all ingredients in a medium bowl. With mixer, blend until smooth then beat at high speed until stiff. Keep the icing covered as it dries quickly. Makes 3 cups.
n n n
This next recipe is easy and one of my most requested recipes for an appetizer. You can make it and put it back in the fridge (covered) and bake it a little later. It is best if it sets for 10 to 15 minutes before you cut into it.
Baked Brie with Pesto
1 round baby brie (Costco sells a 20 ounce and sometimes a 2 pound)
Pesto, either homemade or store-bought
Toasted pinenuts
1 puff pastry sheet, thawed as per directions
Spread top of brie with pesto; sprinkle with toasted pinenuts. Roll out puff pastry sheet and trim so you have a circle big enough to cover the brie. Tuck remaining dough under the cheese.
Place in ovenware quiche dish or pie plate and bake in preheated 375 oven for 20-30 minutes or until golden brown. Remove from oven and let set. Serve with crackers of your choice.
Linda Marrone has lived in Carson City since 1973, and with her husband, Ralph, formerly operated Marrone's Restaurant in Carson City and Somethin's Cookin' Catering.

Comments
Use the comment form below to begin a discussion about this content.
Sign in to comment